Curriculum
TD i13 and i16 - Getting Started
Getting Started with your TD i13 or i16 Device
0/8Positioning your Device
Watch the video above, or follow along with the written instructions below:
0:18– Mounting the Device
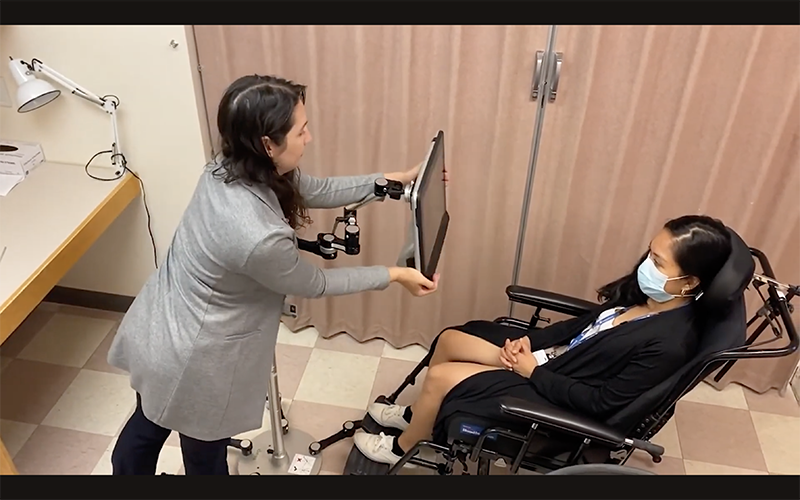
Make sure your mount is set up and your device is securely attached.
0:27– Positioning the Device
Move the mount and device so it is in front of the user, about an arm’s length away. The device should be positioned so that the user is looking directly straight at the device. The angle of the screen surface should match and align to the user’s face. You may need to adjust the mounting arm to extend or retract it so it is comfortable for the user or adjust the angle of the device from the ball joint. Refer to the mount set up guide to understand how to position your mount.
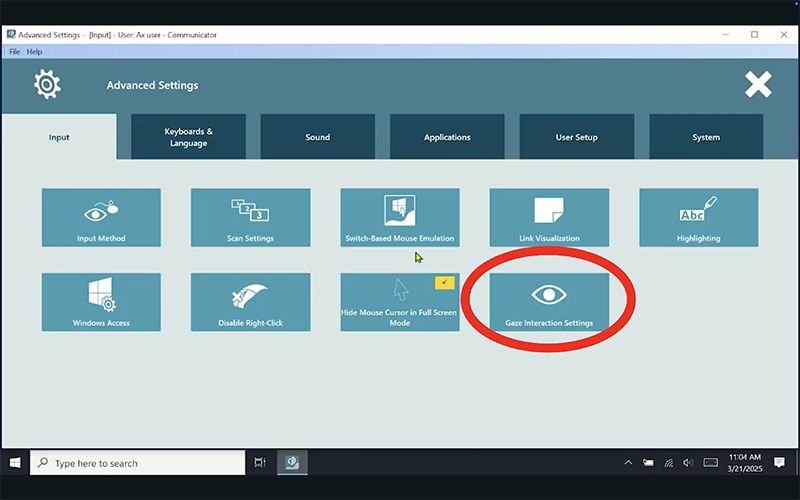
0:54– Open “Track Status”
With the device in front of the user, go to communicator 5 and open Open Gaze Interaction Settings.

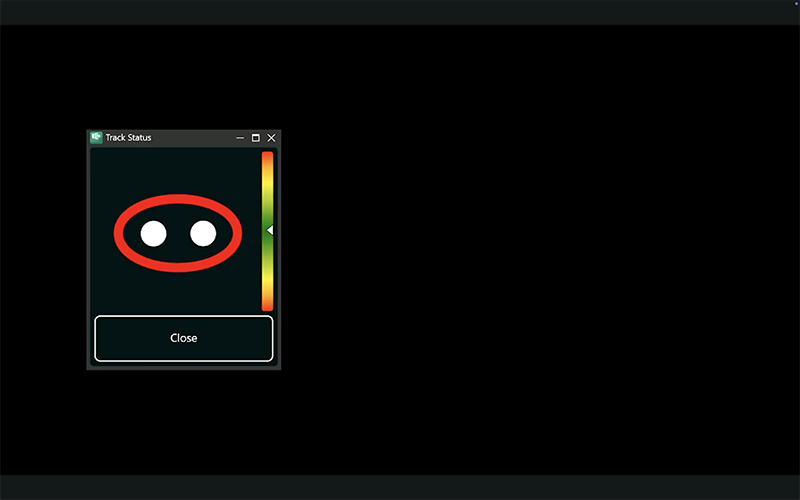
1:12– Fine Tune the Positioning
Turn on Track Status. The Track Status function is used to check if the user is correctly positioned in front of the eye tracker.
The two white dots show the user’s eyes and how they are positioned relative to the screen. For optimal position, the white dots should be in the middle of the black area.
1:35– Find the Optimal Distance
The colour bar on the left with the white arrow shows how far or close the user is positioned from the screen.
-
- If the white arrow is in the green area of the bar, the user is at a good distance from the screen.
- If the arrow is on the lower part of the bar, move the device closer to the user.
- If the arrow is on the upper part of the bar, move the device further away from the user.
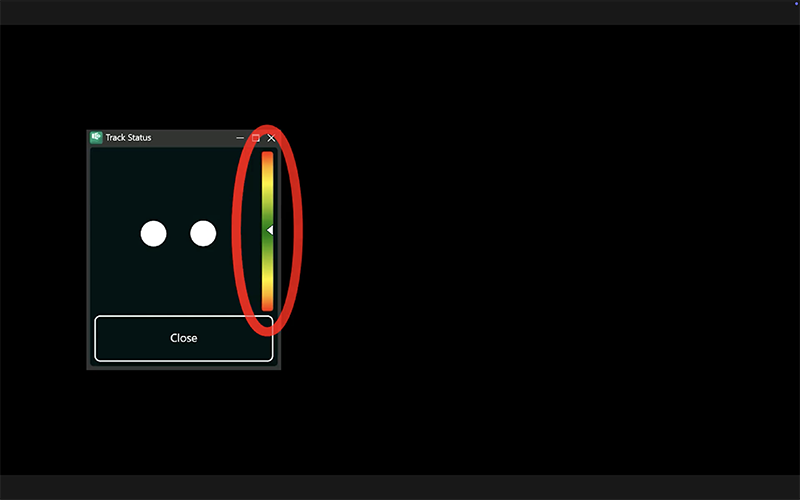
Fine-tune the device positioning so the track status shows both eyes in the center of the screen, and the screen is at the right distance according to the color bar. Always reposition the device, not the user.
